This year my daughter wanted Angry Birds on her cake. She specifically wanted a 3 tier cake with a slingshot of course.
This is what I created...
I could have bought a slingshot and placed it on the cake but would Chef Duff do that? So I went for a Rice Krispy treat version and covered it in melted chocolate, put it on a stick, and placed it through the layers(I also did this for the little TNT boxes). I used a rolled Airhead for the sling. The birds were purchased from Amazon.
I used to find fondant very difficult to work with. I was looking around Amazon one day and came across fondarific fondant. It was rated high and nut free! Score! I tried it out on my sons cake and it worked great (it also tastes better then most fondant). See below...
A Super hero lovers dream!
Tuesday, October 23, 2012
Shabby table to chic look
I love this transformation! A table I bought at Goodwill for 4$ and transformed it for under 20$.
Here is my secret weapon. 1-2-3 primer- No sanding needed! I sprayed the legs and used a foam roller for the top. Foam rollers are very important when panting furniture.
After letting the primer dry overnight. I mixed the paint. Ever hear of Annie Sloan chalk paints? They are sweeping the furniture painting lovers off their feet. You shouldn't need to even paint primer with this paint but I did anyway. It covers nice and I wasn't doing any antique finish to it.
Ever notice the clearance paint flubs at Home Depot and Lowes?
These paints are generally $11-$15 if mixed a color of your choice. Isn't this a cool color for $2.50?
To make the chalk paint, I started with a quart measuring pail and figured out what 1:4 ratio (1 part Plaster of Paris and 4 parts paint) was needed. I measured the Plaster of Paris first, dry, then added water and mixed it till it was smooth. Usually 1 Tablespoon at a time till the desired consistency. Finally, I mixed the paint together with the Plaster of Paris mixture.
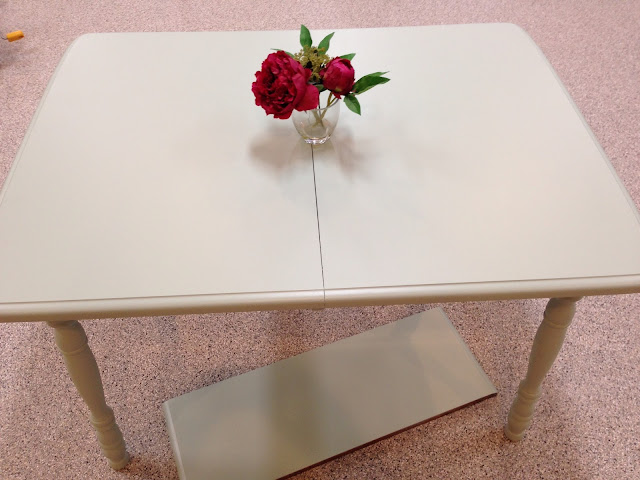
Beautiful!
There is one final step. Adding water based polyurethane. I used a spray on version from Menards that had very little smell. I applied 4 coats of this as directed several hours apart.
The piece on the floor is the leaf for the table. I love how this color came out!
Thursday, October 18, 2012
Open frame design
Open frames are a fun way to class up the wall and make it interesting. Here is what I got at my favorite store- Goodwill. All these frames were 2.99 or under....
They all look like a nice color in this picture but they are actually different shades of gold.

They all look like a nice color in this picture but they are actually different shades of gold.
And here is what was inside some of them.... (Look beyond what you see)
Pretty, Huh?
I purchased a flat black spray paint and 3M medium abrasive scrubber. I painted the frames and let them dry overnight. I then used the scrubber to return the gold finish along the edges and design of the frames. This is my end result...
And the finished product on the wall...
Total cost: around $15.00
Subscribe to:
Posts (Atom)