It's that time of the year again where the scents of evergreen and pumpkin whisk you away into holiday dreaming. These muffins are absolutely incredible! What makes them so amazing is the straight muffin pan from Demarle at Home! Clean up is a breeze and you guests (or kids!) will be begging for another.
As you can see, these aren't just any pumpkin muffin. These are deluxe pumpkin and apple streusel muffins.
find the recipe here:http://allrecipes.com/recipe/pumpkin-apple-streusel-muffins
There are over 500 excellent reviews on this muffin and I can see why! These muffins taste even better in the Demarle at home straight muffin pan. See, any baking is made so much better when there is airflow to what you are cooking. Combine this with the silicone and glass woven together and you have perfect crisp texture on the outside with a soft, perfectly cooked inside. These are bakery worthy!
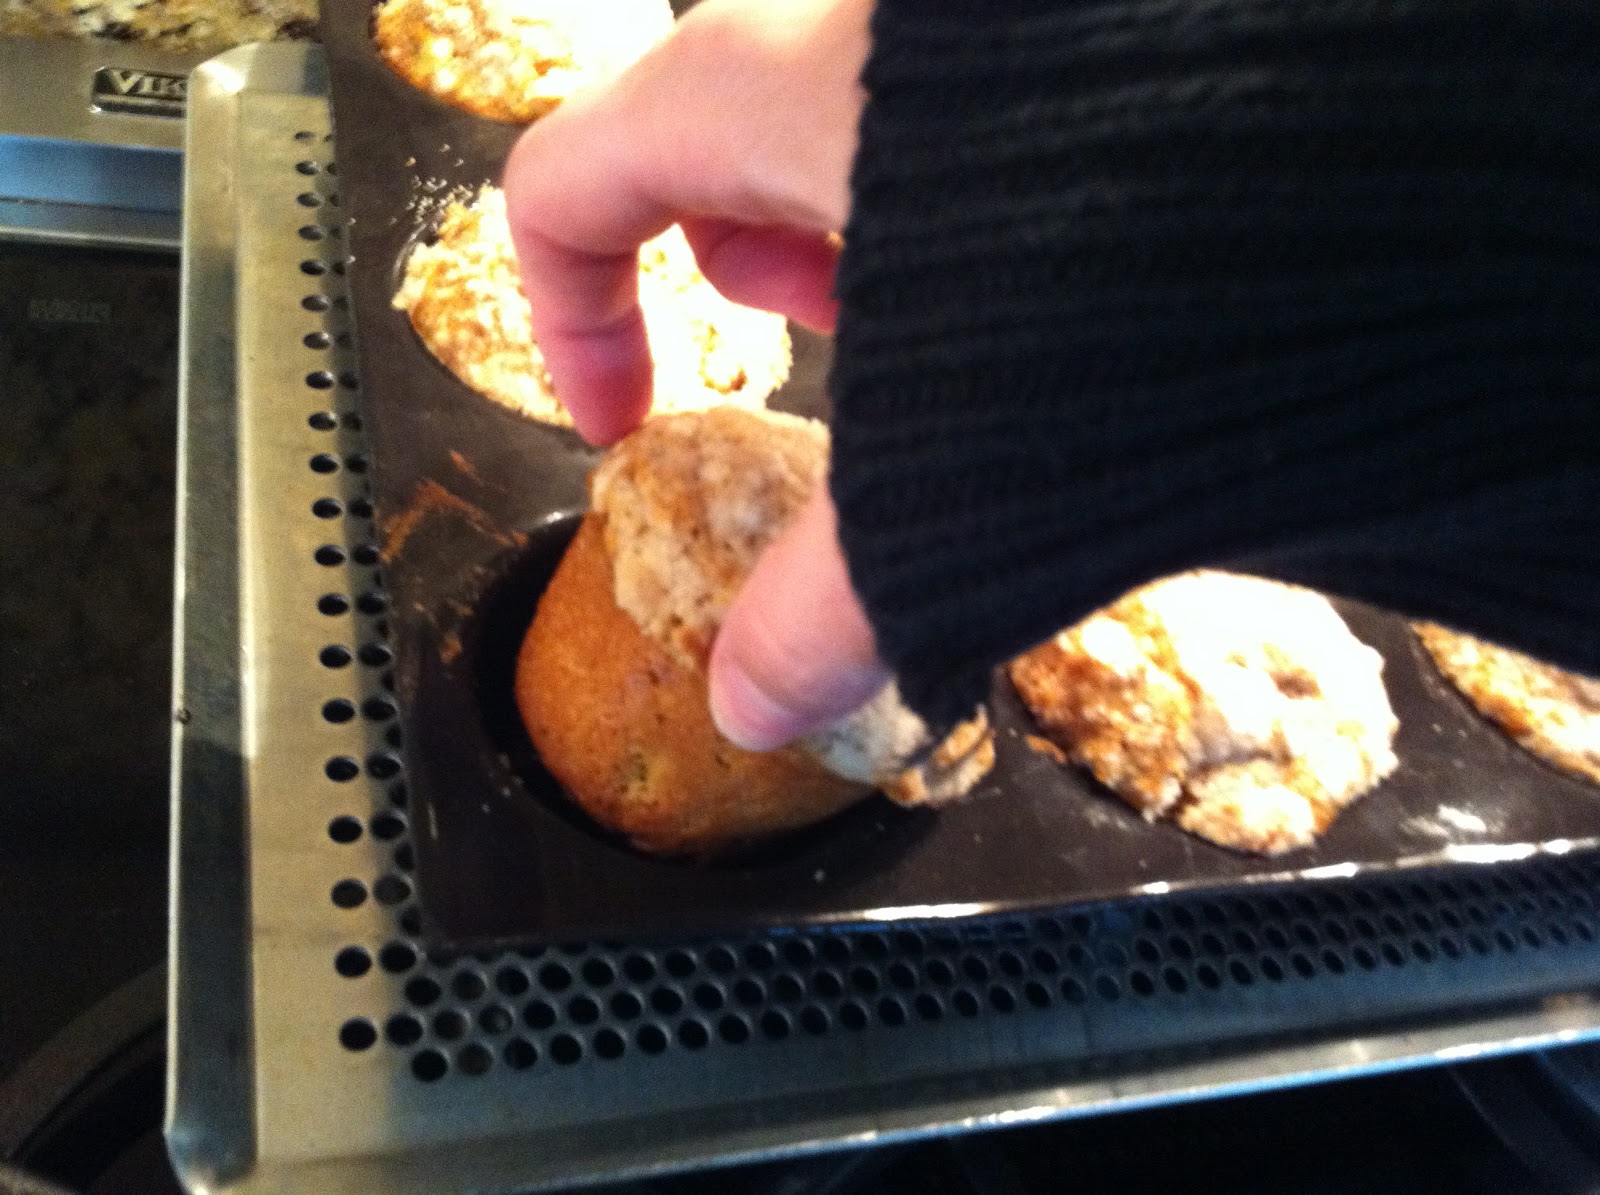
See the spills? No big deal because it literally falls off these pans. I've never, EVER enjoyed the clean up because I am such a messy cook. BUT, with these pans, there is hardly anything to clean. Take a look at how they pop out of the pan. No papers needed!
Saturday, November 3, 2012
Tuesday, October 23, 2012
Angry Bird Cake
This year my daughter wanted Angry Birds on her cake. She specifically wanted a 3 tier cake with a slingshot of course.
This is what I created...
I could have bought a slingshot and placed it on the cake but would Chef Duff do that? So I went for a Rice Krispy treat version and covered it in melted chocolate, put it on a stick, and placed it through the layers(I also did this for the little TNT boxes). I used a rolled Airhead for the sling. The birds were purchased from Amazon.
I used to find fondant very difficult to work with. I was looking around Amazon one day and came across fondarific fondant. It was rated high and nut free! Score! I tried it out on my sons cake and it worked great (it also tastes better then most fondant). See below...
A Super hero lovers dream!
This is what I created...
I could have bought a slingshot and placed it on the cake but would Chef Duff do that? So I went for a Rice Krispy treat version and covered it in melted chocolate, put it on a stick, and placed it through the layers(I also did this for the little TNT boxes). I used a rolled Airhead for the sling. The birds were purchased from Amazon.
I used to find fondant very difficult to work with. I was looking around Amazon one day and came across fondarific fondant. It was rated high and nut free! Score! I tried it out on my sons cake and it worked great (it also tastes better then most fondant). See below...
A Super hero lovers dream!
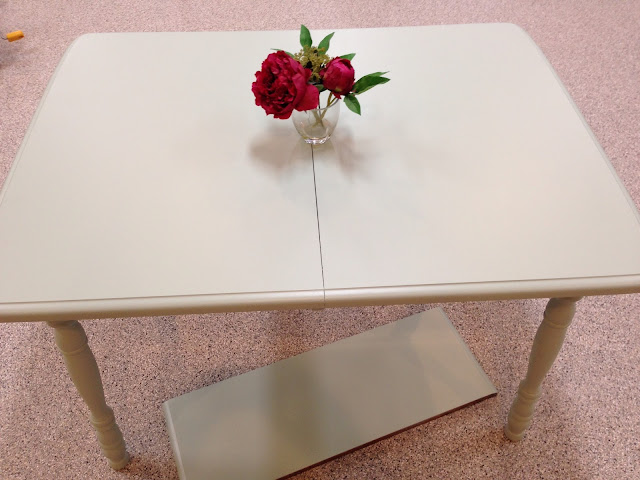
Shabby table to chic look
I love this transformation! A table I bought at Goodwill for 4$ and transformed it for under 20$.
Here is my secret weapon. 1-2-3 primer- No sanding needed! I sprayed the legs and used a foam roller for the top. Foam rollers are very important when panting furniture.
After letting the primer dry overnight. I mixed the paint. Ever hear of Annie Sloan chalk paints? They are sweeping the furniture painting lovers off their feet. You shouldn't need to even paint primer with this paint but I did anyway. It covers nice and I wasn't doing any antique finish to it.
Here is my secret weapon. 1-2-3 primer- No sanding needed! I sprayed the legs and used a foam roller for the top. Foam rollers are very important when panting furniture.
After letting the primer dry overnight. I mixed the paint. Ever hear of Annie Sloan chalk paints? They are sweeping the furniture painting lovers off their feet. You shouldn't need to even paint primer with this paint but I did anyway. It covers nice and I wasn't doing any antique finish to it.
Ever notice the clearance paint flubs at Home Depot and Lowes?
These paints are generally $11-$15 if mixed a color of your choice. Isn't this a cool color for $2.50?
To make the chalk paint, I started with a quart measuring pail and figured out what 1:4 ratio (1 part Plaster of Paris and 4 parts paint) was needed. I measured the Plaster of Paris first, dry, then added water and mixed it till it was smooth. Usually 1 Tablespoon at a time till the desired consistency. Finally, I mixed the paint together with the Plaster of Paris mixture.
Beautiful!
There is one final step. Adding water based polyurethane. I used a spray on version from Menards that had very little smell. I applied 4 coats of this as directed several hours apart.
The piece on the floor is the leaf for the table. I love how this color came out!
Thursday, October 18, 2012
Open frame design
Open frames are a fun way to class up the wall and make it interesting. Here is what I got at my favorite store- Goodwill. All these frames were 2.99 or under....
They all look like a nice color in this picture but they are actually different shades of gold.

They all look like a nice color in this picture but they are actually different shades of gold.
And here is what was inside some of them.... (Look beyond what you see)
Pretty, Huh?
I purchased a flat black spray paint and 3M medium abrasive scrubber. I painted the frames and let them dry overnight. I then used the scrubber to return the gold finish along the edges and design of the frames. This is my end result...
And the finished product on the wall...
Total cost: around $15.00
Friday, August 10, 2012
Thursday, May 17, 2012
Homemade Soup -YUM!
It's so easy to make your own homemade noodles with or without professional equipment. Here is one of my favorite recipes for soup with no fancy frills just good ol' yummy flavor.
First, make the noodles:
-
- 2 1/2 cups all-purpose flour
- 1 pinch salt
- 2 eggs, beaten
- 1/2 cup milk
- 1 tablespoon butter
- In a large bowl, stir together the flour and salt. Add the beaten eggs, milk, and butter. Knead dough until smooth, about 5 minutes. Let rest in a covered bowl for 10 minutes.
- On a floured surface or a wonderful Roul'Pat, roll out to 1/8 or 1/4 inch thickness. Cut into desired lengths and shapes.
- Let noodles sit and air dry before cooking. As you can see from above, there is no rule on how to cut the noodles. Once they are in the pot, no one can see the difference.
- For the best chicken noodle soup, I purchase a rotisserie chicken from the grocery and when its half eaten (skins and ties removed!)its added to a pot of water no measuring needed! Add a 1.2 chopped onion. Let the chicken and onion work their mojo on low until the meat is falling off. Pull out the chicken as careful as possible making sure no bones are left behind!
- Let the chicken cool and then pull off the remaining meat adding it to the pot with:
- 4 large carrots chopped
- 2 stalks celery chopped
- salt and pepper to desired taste
- Once carrots are tender, bring pot to a boil and add noodles. The noodles will get larger when cooked. Cook for approx. 5 minutes.
- Add chopped FRESH flat leaf parsley before serving. Love the green serving spoon?
Sunday, April 29, 2012
Lemon Coconut Tarts
Here's a great spring time recipe...
Lemon Curd:
8 Large Egg Yolks
Grated zest of 3 Lemons
1/2 Cup fresh Lemon Juice (squeeze after zesting!)
1 Cup Sugar
Pinch Salt
10 Tbsp. cold unsalted butter (cut into small pieces)
In a pan whisk egg yolks, zest, juice, sugar and salt. Cook over medium heat, whisking constantly!, until mixture thickens-approx.10 minutes. Remove from heat and whisk in butter 1-2 pieces at a time until melted. Cover with plastic wrap pressing to surface of curd and refrigerate at least 4 hours.
Coconut Crust:
3/4 Bag of sweetened flake coconut (about 3 1/2 cups)
1 cup of cookie crumbs (I like shortbread)
4 Tbsp. unsalted butter, melted and cooled
In a food processor add cookies and pulse until they are crumbs. Then measure the crumbs to make sure you have 1 cup. Return to food processor and add coconut. Pulse and slowly drizzle butter in until the crust becomes crumbles. Firmly press into your choice of mold: tart mold for a whole tart or I used the new crown mold for mini tarts! Bake at 350 degrees for 15-20 (watch closely because coconut browns quickly! Once removed from oven, leave in the mold till completely cooled or the tarts will break. When cooled, fill tart will lemon crd filling and serve. Dress it up with whip cream or powdered sugar. YUM!
Lemon Curd:
8 Large Egg Yolks
Grated zest of 3 Lemons
1/2 Cup fresh Lemon Juice (squeeze after zesting!)
1 Cup Sugar
Pinch Salt
10 Tbsp. cold unsalted butter (cut into small pieces)
In a pan whisk egg yolks, zest, juice, sugar and salt. Cook over medium heat, whisking constantly!, until mixture thickens-approx.10 minutes. Remove from heat and whisk in butter 1-2 pieces at a time until melted. Cover with plastic wrap pressing to surface of curd and refrigerate at least 4 hours.
Coconut Crust:
3/4 Bag of sweetened flake coconut (about 3 1/2 cups)
1 cup of cookie crumbs (I like shortbread)
4 Tbsp. unsalted butter, melted and cooled
In a food processor add cookies and pulse until they are crumbs. Then measure the crumbs to make sure you have 1 cup. Return to food processor and add coconut. Pulse and slowly drizzle butter in until the crust becomes crumbles. Firmly press into your choice of mold: tart mold for a whole tart or I used the new crown mold for mini tarts! Bake at 350 degrees for 15-20 (watch closely because coconut browns quickly! Once removed from oven, leave in the mold till completely cooled or the tarts will break. When cooled, fill tart will lemon crd filling and serve. Dress it up with whip cream or powdered sugar. YUM!
Subscribe to:
Posts (Atom)